How to Sell on Amazon Canada: a Comprehensive Guide
Selling on Amazon Canada makes it possible to run a business and work from home simultaneously. Entering this market presents immense opportunities for growth and success for anyone who wants to learn how to make money selling books, new items, and used things… even without inventory.
In this guide, we'll explore why moving into this market is a smart move for sellers and showcase the perks that await those who venture into the realm of Canadian online retail.
Table of contents
Amazon.com vs. Amazon.ca
Online sellers can choose one of Amazon's global marketplaces to sell a variety of products. Unlike the main site, Amazon.com, the Amazon.ca market can offer several advantages, especially for sellers in the American market who want to expand their reach with minimal risks. Let's see why it might be beneficial for you to consider selling on the Canadian platform.
Expanding your customer base: If you are already selling on Amazon.com, you can attract more customers and improve your chances by selling on two or more marketplaces simultaneously.
Reduced level of competition: While selling on amazon.com gives you access to a vast marketplace with fierce competition, selling on amazon.ca offers a less saturated environment, offering sellers greater visibility and opportunities to differentiate.
Pay-per-click (PPC) costs: PPC costs on the Canadian platform are notably lower compared to those on the US platform, enabling sellers to enhance their profit margins. With decreased competition comes fewer instances of price wars, further facilitating the potential for increased profitability.
Thus, regardless of where you are located, expanding to the Canadian Amazon market can benefit your business.
How to Start Selling on Amazon.ca
Starting a business on Amazon Canada is essentially the same process as on any other marketplace, but with its own nuances. Let's review step-by-step instructions on how to sell on Amazon Canada.
Step 1: Conduct Thorough Product Research
Finding the perfect product to kickstart your Amazon sales journey is both exciting and crucial. This step lays the foundation for your success, and can be the difference between thriving and merely surviving in a competitive marketplace.
Find Product Ideas
Fortunately, AMZScout can equip you with a suite of comprehensive tools to simplify and enhance your product discovery process. Let’s analyze them thoroughly:
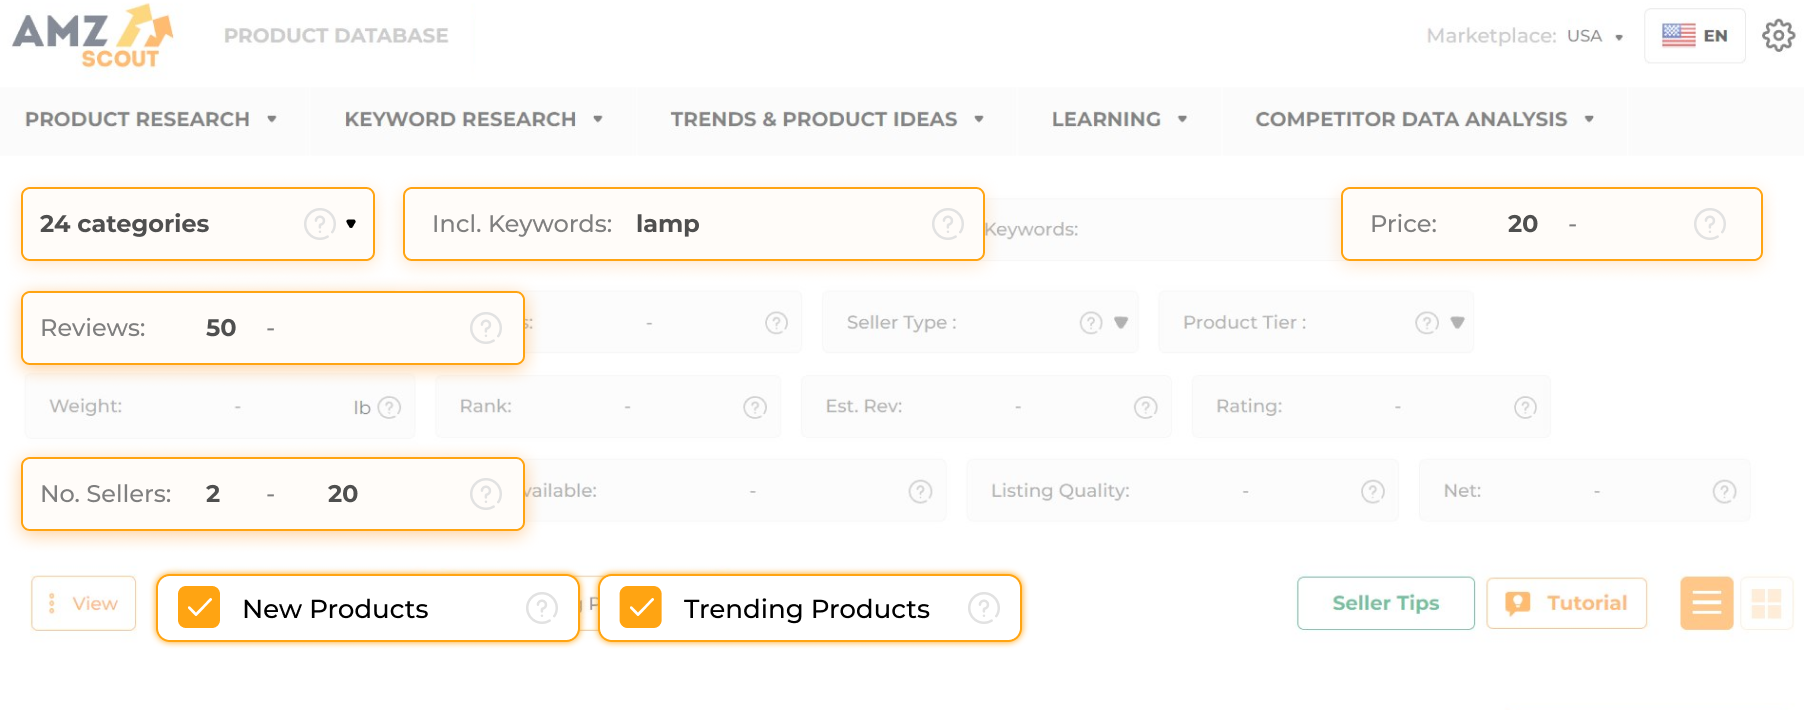
Open the AMZScout Product Database. To start your free trial, sign up for an account on the AMZScout website and log in to the platform.
Select “Marketplace: Canada”. You need to specify the marketplace so that the database fetches your data according to your preferences.
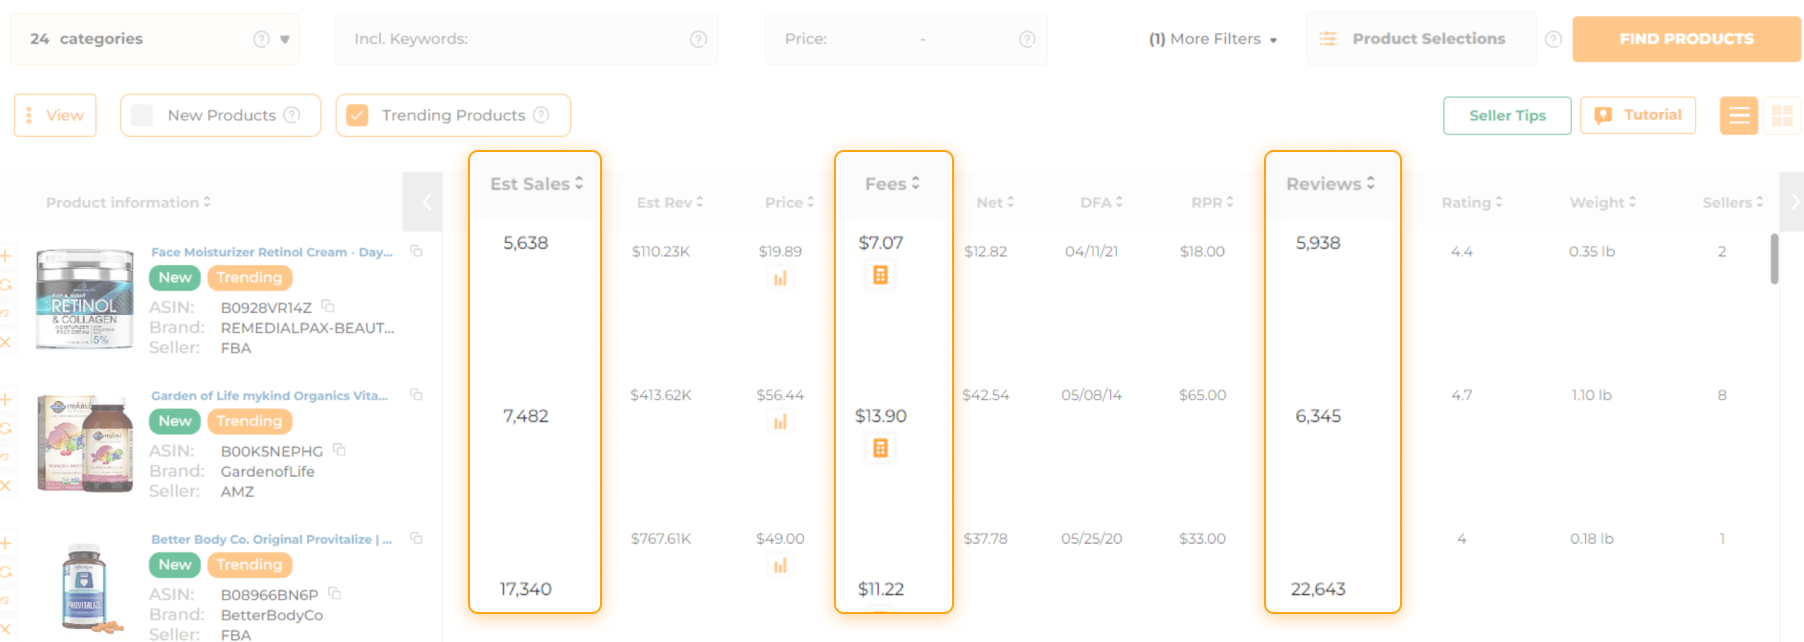
Apply the necessary filters. The database has simple and advanced filtering options. You can filter by categories, keywords, price range, sales rank, and more to help you find products that align with your interests and business goals.
Click “Find Product”. After entering your preferences into the filters and narrowing down your results, click “Find Products” to reveal a list of products that match your interests and needs.
From the list you obtain using the AMZScout Database, you can choose several of the most interesting products for further research.
Check the Potential Profitability of These Products
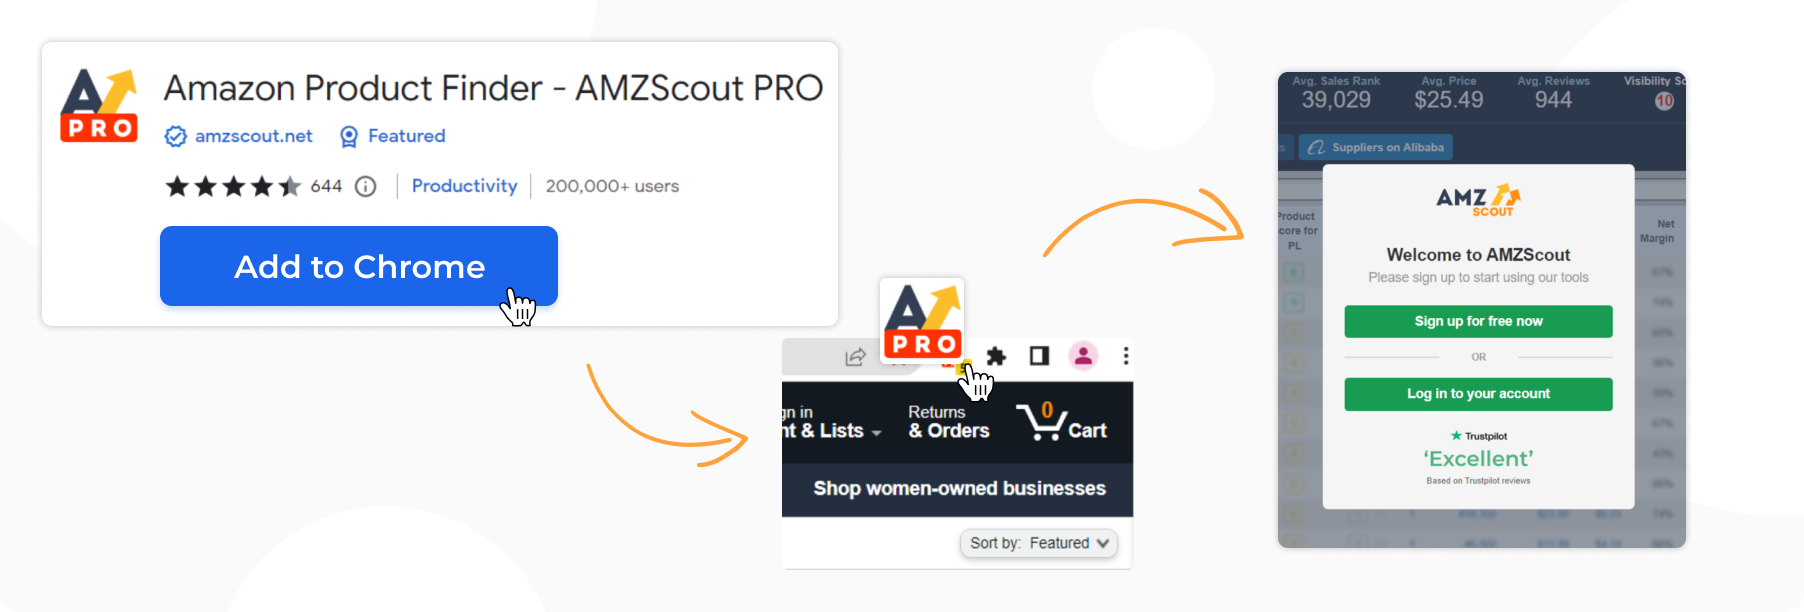
After identifying potential product ideas in the AMZScout database, your next crucial step is to assess their potential profitability. This is where the AMZScout PRO Extension comes into play. Here's a detailed guide on how to use the extension and its advantages:
Installation and set-up. Install the AMZScout PRO Extension for Chrome and start your free trial.
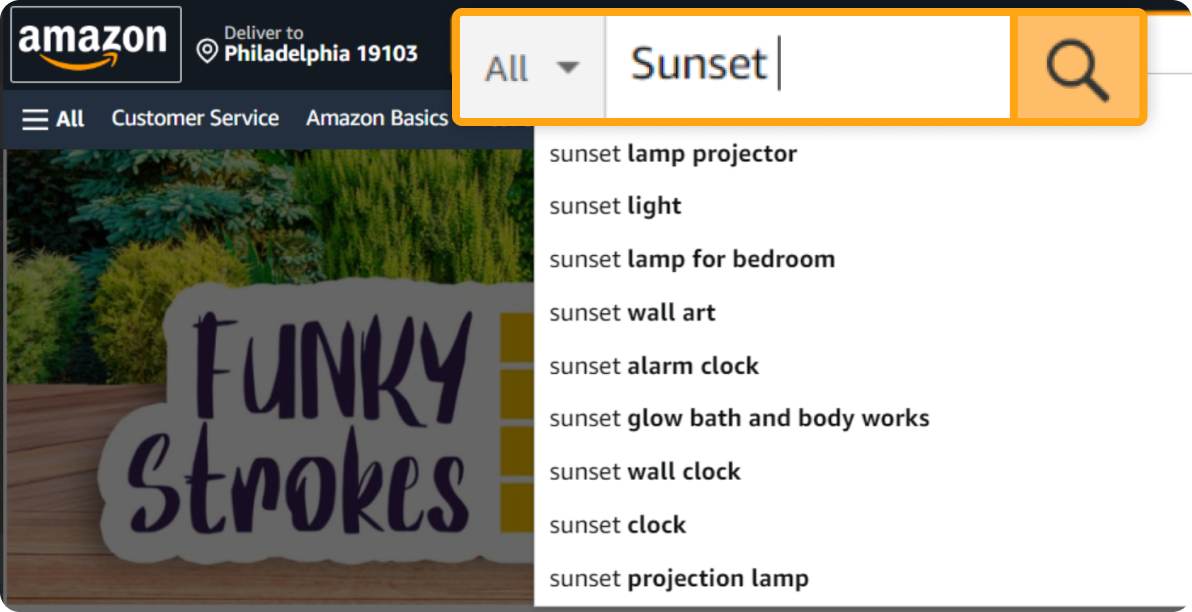
Search for a niche. Start by searching for a niche on Amazon, and open the search results page for all products from that niche.
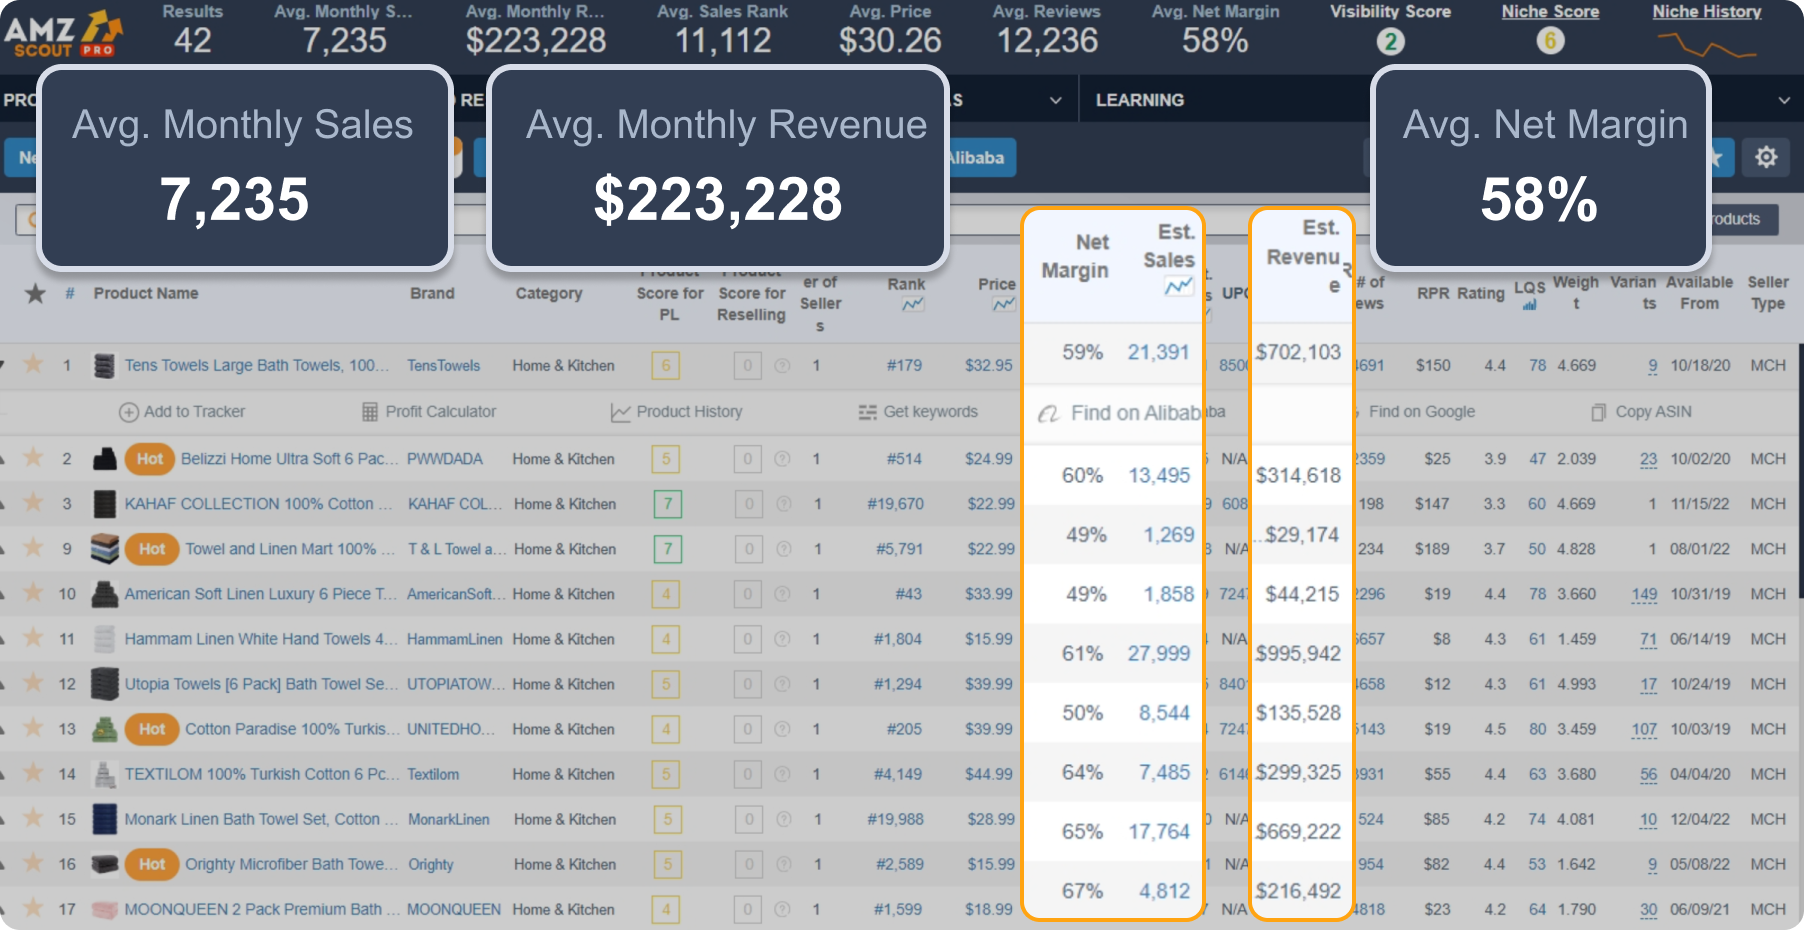
Access product data. With the AMZScout PRO Extension enabled, you'll see metrics on average sales, revenue, and fees displayed at the top of the dashboard, providing valuable insights into the niche's performance.
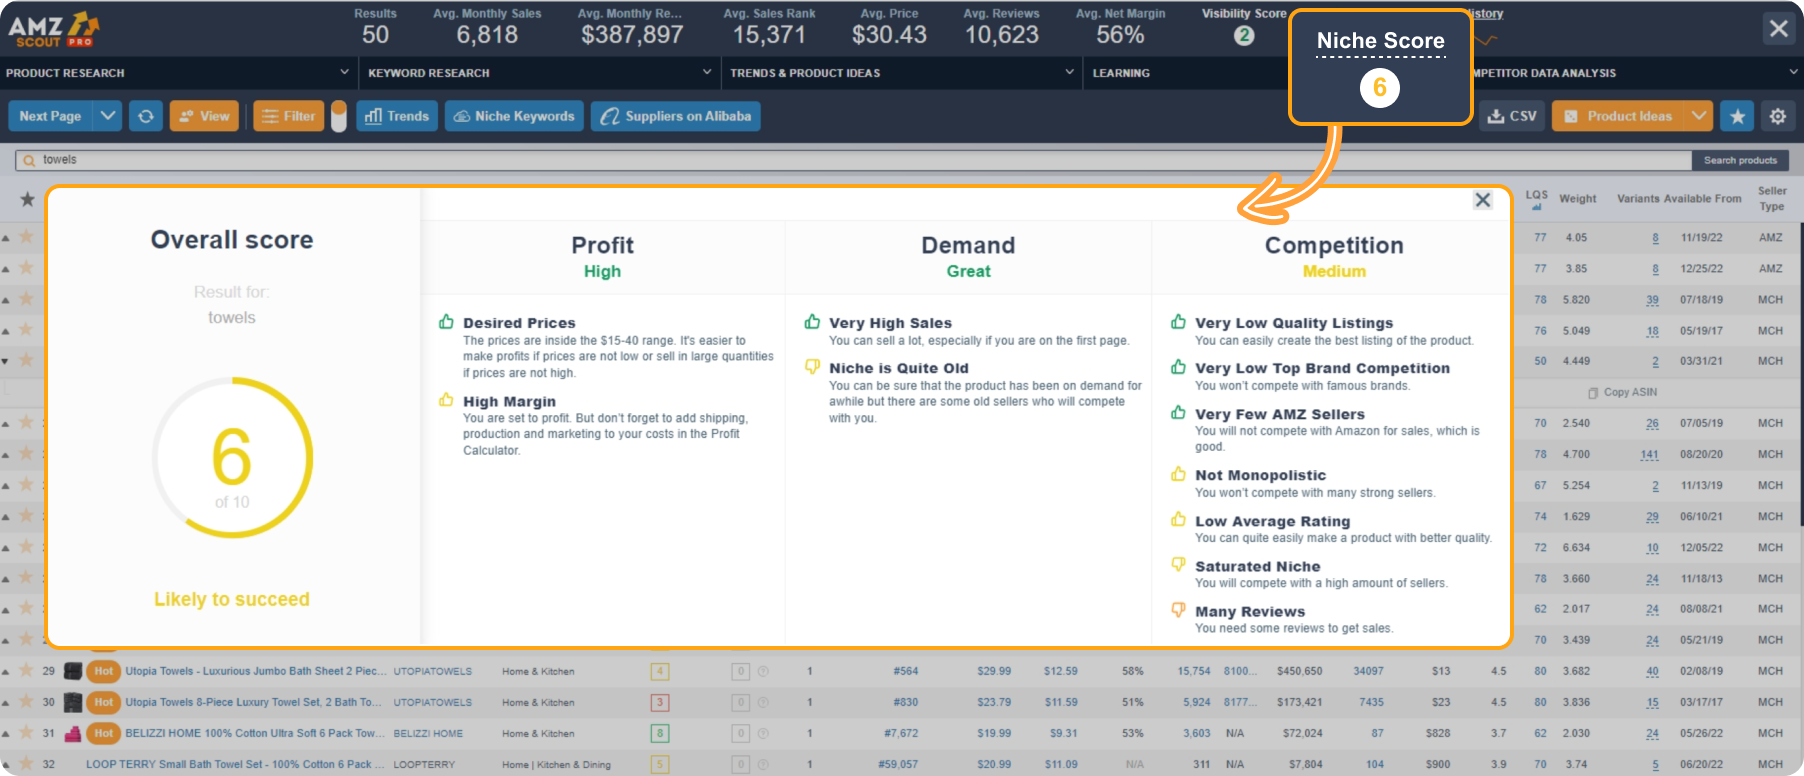
Click Niche Score. This will show you demand, profit, and competition within the niche, indicated by scores from 1 to 10. The higher the score, the better.
Check the Niche History. This feature enables you to track the niche’s performance over time and identify trends.
Check the sales numbers. Examine the monthly sales of individual products in the niche. By sorting the results based on the number of sales, you can see the top most frequently selling products within the niche.
Click Product History. This will give you a full understanding of changes in sales and price over a given period of time in order to determine whether the product has stable demand.
Use the Profit Calculator. Once you select your desired product from the results, you can calculate its profit potential. This is where you have to factor in taxes, the cost of the product, additional expenses. The result will indicate how much profit you can generate from selling this product.
By following these simple steps, you will be able to find the best options to sell on Amazon successfully.
Step 2: Set Up Your Account
Depending on where you start your business (from Canada or elsewhere) - you have two options when it comes to setting up your Amazon seller account.
If you sell from Canada
Start by creating a new Amazon account using your email and password. Provide details and the location of your business, making sure to list Canada as your business location.
If you sell from the US or other countries
Another option is the North America Unified Account, which is a streamlined solution offered by Amazon, allowing sellers to manage their operations seamlessly across multiple North American marketplaces, including amazon.com (United States), amazon.ca (Canada), and amazon.com.mx (Mexico). With this unified account, sellers can consolidate their listings, inventory, and orders across these marketplaces, which simplifies the selling process and provides greater efficiency.
To set up your North America Unified account:
Click the language switcher at the top of the page in your Amazon Seller Central Account, and see if other Amazon marketplaces appear as options.
Request support to confirm your North America Unified Account.
If you are registered as an individual seller in Canada, you will have access to Amazon.com and amazon.ca, but not Amazon.com.mx.
If you are registered as a professional seller in Canada, you will have access to all three of these Amazon account options.
Account moderation may take some time, so you can also start looking for a reliable supplier at the same time.
Step 3: Resolve Legal Issues as Needed
For any Amazon seller, it's essential to follow all rules, laws and regulations. If you are selling from outside of Canada, there are even more factors to consider. Here's a guide on navigating the legal aspects of selling on Amazon in Canada from other countries, like the USA:
Business registration and licensing. You’re not required to possess a Canadian business license to start selling on amazon.ca. Having a registered Canadian business is optional. You can opt to register your Amazon FBA business as a limited liability company, enabling you to access benefits, such as brand registry and other advanced seller tools.
Tax ramifications. Amazon sellers are generally required to pay sales tax when selling on amazon.ca. Amazon sellers who operate on amazon.ca are generally obligated to address any tax ramifications, including sales tax liabilities. That’s why it's crucial to acquaint yourself with all Canadian tax regulations and legal requirements. Canada levies three main types of taxes: the Goods and Services Tax (GST), the Harmonized Sales Tax (HST), and the Provincial Sales Tax (PST) on most goods and services, contingent upon the destination of your customer.
Customs and import regulations. Importing goods from the US or abroad requires adherence to all Canadian customs regulations, including tariffs, duties, and taxes. But utilizing Amazon's Fulfillment by Amazon (FBA) services can simplify the customs process by handling import duties and taxes on behalf of sellers, streamlining the process of international sales on amazon.ca.
Legal agreements and dispute resolution. Review and comply with Amazon's Seller Agreement and policies, as well as any additional terms specific to selling on Amazon Canada.
Having resolved all necessary document issues and selected potentially profitable products, you can continue with the process of selling products.
Step 4: Find a Reliable Supplier
Once you create an account and choose a product, you need to figure out how you plan to source your products. Finding a reliable supplier for the products you will sell online is crucial for ensuring quality, timely delivery, and overall customer satisfaction.
Depending on which sales method you choose, you can search for different suppliers. For example, if you want to engage in arbitrage, consider other online marketplaces or local stores that offer lower prices and discounts. If you want to offer products sold under your own brand, Alibaba is a good option. When you’re trying to find suppliers for dropshipping, consider various options like Walmart, eBay, and AliExpress. Whichever option you choose, it’s always essential to evaluate each platform's reliability, product quality, and shipping expansions.
Finding Alibaba Suppliers
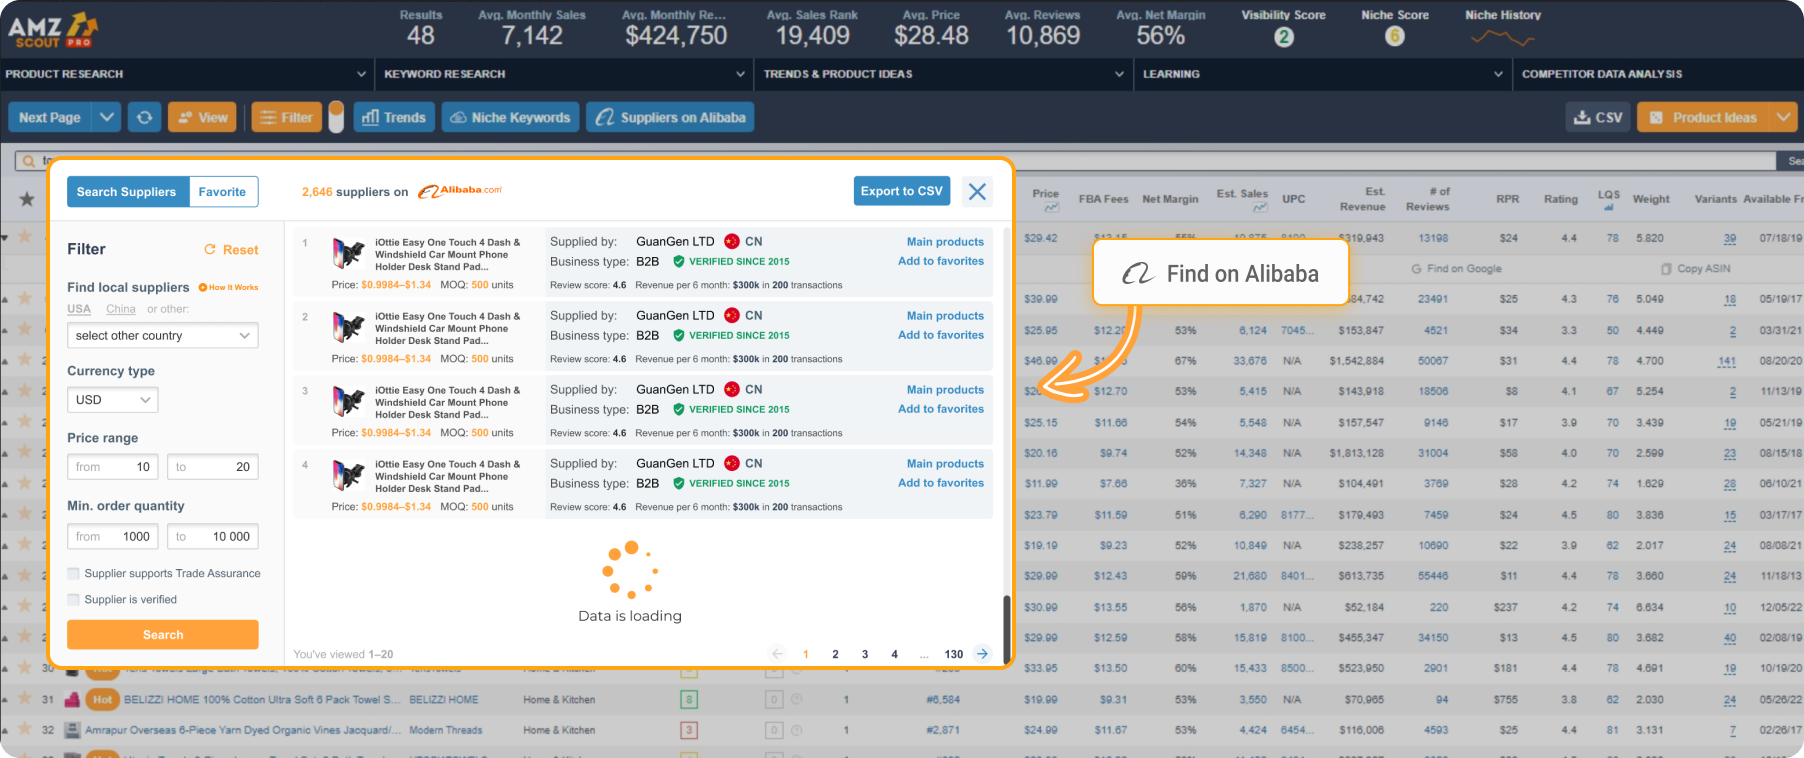
One of the most popular and proven methods over time has been sourcing suppliers with low prices from the Chinese marketplace, Alibaba. With the AMZScout PRO Extension enabled, you can find direct suppliers from Alibaba.
Open a product page on Amazon that you’re interested in selling.
Click “Find on Alibaba”.
You will be redirected to an Alibaba page with offers for a similar product from various suppliers.
Criteria for Choosing Suppliers
Consider the pricing structure: Check the prices offered by each supplier, ensuring that they align with your budget and allow for competitive fees on amazon.ca.
Check reviews: Ensure reliability by scrutinizing supplier reviews, seeking out those with a track record of consistent product quality and on-time delivery.
Read the terms and conditions: For example, check the delivery terms and options for incorporating your logo for private labeling.
Ultimately, by carefully evaluating these factors and selecting a reliable supplier, you can enhance your success as an Amazon.ca seller and capitalize on the platform's lucrative opportunities.
Step 5: Arrange Product Shipping
After selecting a product and finding suppliers, it’s time to decide how to ship your product. There are different options available that depend on your preferences, financial capabilities for shipping, and your Amazon business strategy. Let's explore these.
Fulfillment Methods
When considering product transportation for your Amazon business, several key decisions must be made to ensure efficient logistics.
First, choosing between Fulfillment by Amazon (FBA) and Fulfillment by Merchant (FBM) will impact your shipping plan.
FBA entails sending your inventory to Amazon's fulfillment centers, allowing them to handle all aspects of storage, packaging, and shipping to customers. With FBA, there are additional fees, but this option is also much handier and more convenient.
In contrast, FBM involves managing these processes yourself. This hands-on approach gives you more control over the entire fulfillment process, allowing you to customize your packaging, branding, and customer experience according to your preferences.
Based on your preference and business model, you can go with FBA for streamlined shipping logistics, or FBM for greater control over the process.
Transportation Options
Next, you'll need to decide how to ship your products to an FBA warehouse or elsewhere. If you order your products from China, you can choose between ocean freight or air shipping.
Ocean freight is typically more cost-effective for larger shipments, but entails longer transit times, while air freight offers faster delivery but at a higher cost.
Consider your budget, time constraints, and the types of products you sell when making this decision that aligns with your business needs and priorities.
Shipping Plan
Once you've chosen your shipping method, you'll need to schedule pickup or drop-off of your products with your chosen freight carrier. Coordinate with the carrier to ensure timely and efficient transportation of your goods, taking into account lead times and delivery deadlines.
Tracking your shipment is crucial for monitoring its progress and ensuring timely delivery to Amazon's fulfillment centers, or directly to customers. Unlike FBM, where tracking is the responsibility of the seller, FBA provides built-in tracking through Amazon's platform, offering real-time updates on the status of your inventory from shipment to delivery.
In conclusion, when planning product shipping and fulfillment for an Amazon business, sellers should consider various factors such as financial capabilities, timing, business structure, and goals.
Step 6: List Your Products
After completing your product research and sourcing, now you are ready to list your products on Amazon Seller Central and start selling them in Canada.
Here's how to list your products efficiently:
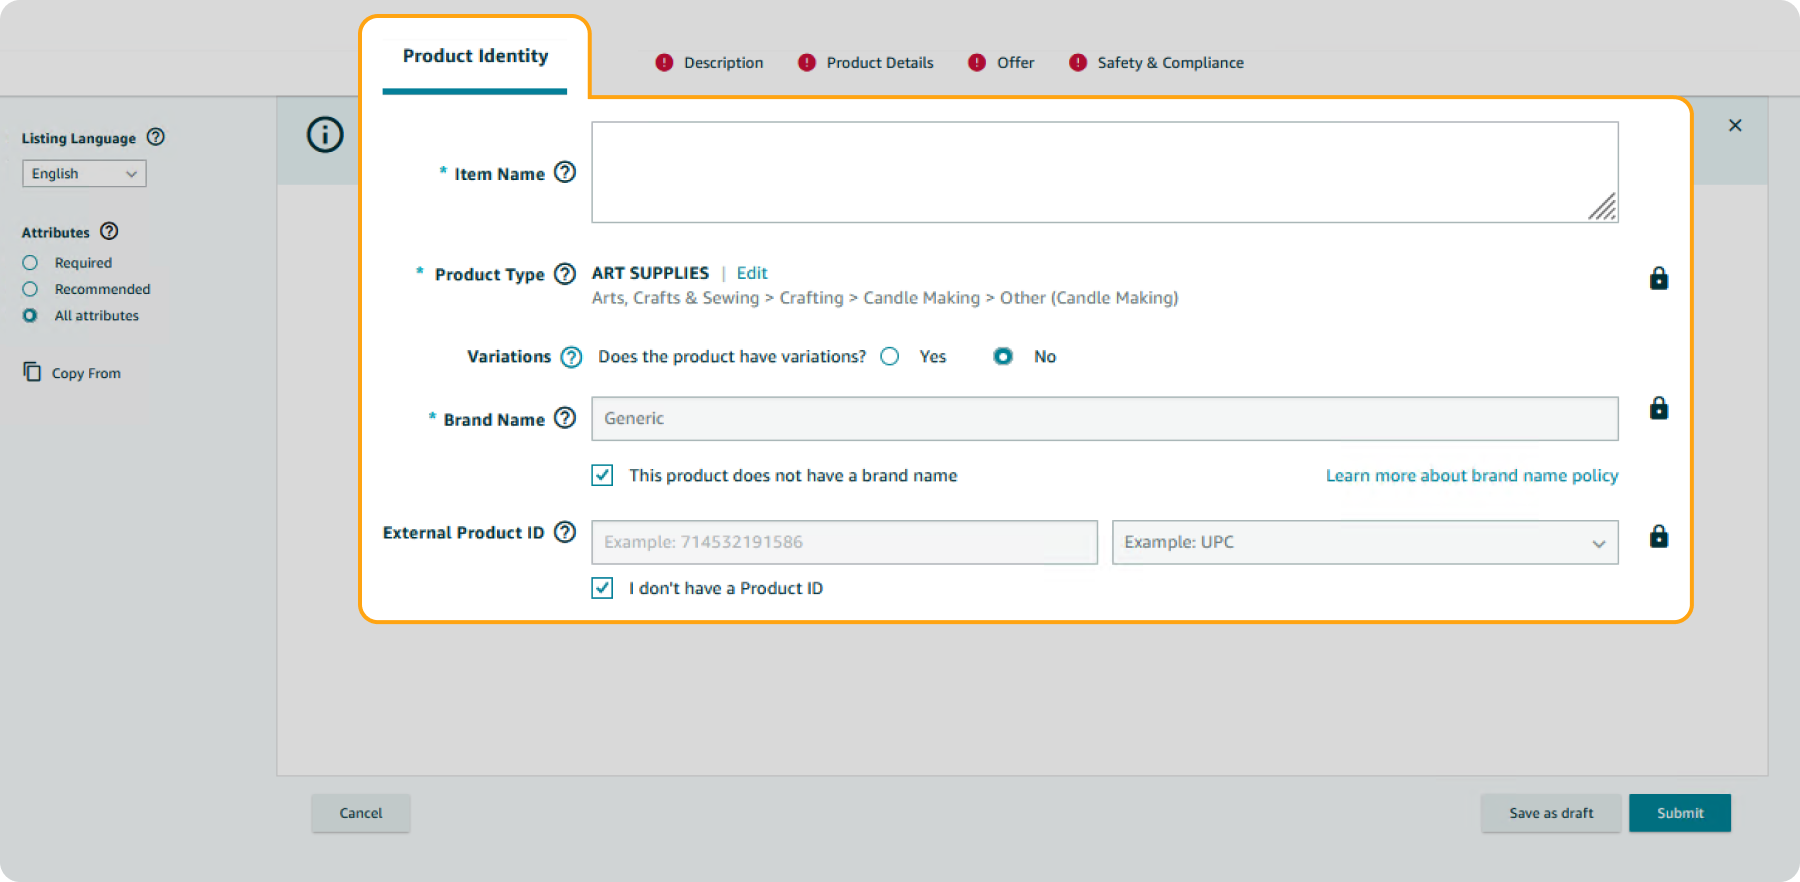
Head to Amazon Seller Central to the Inventory section.
Enter the main product info, including product name, ID fulfillment options, etc.
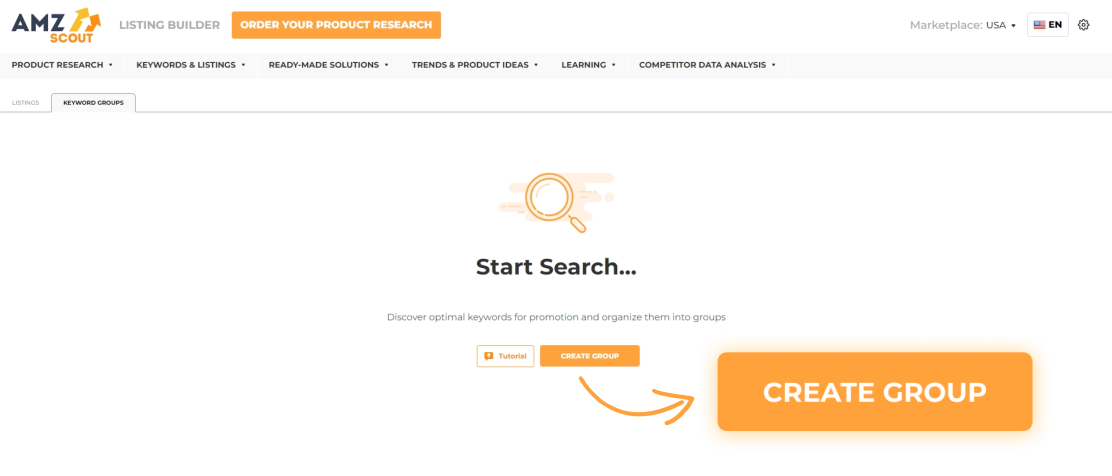
Create an SEO-optimized title, description, and bullets. Tools like AMZScout's AI Listing Builder can help you improve the quality of your listing text by prioritizing keywords based on their importance for better ranking. This tool’s convenient character count tracker also helps you stay within the required character limits. Leverage the power of AI to help you generate text using selected keywords.
Upload product photos. To ensure good visibility, upload high-quality images of your product.
Create your offer. Enter the quantity of items and your price.
Save your listing and start selling.
Once your listing is created, it's crucial to monitor its performance and make adjustments as necessary. Regularly assess metrics such as conversion rates, click-through rates, and keyword ranking to gauge your listing's effectiveness. Analyze customer feedback and reviews to identify areas for improvement.
Step 7: Use Amazon PPC
After listing your products on Amazon, you’ll be able to apply the Amazon PPC advertising system to increase visibility of your products.
Amazon’s Pay-Per-Click (PPC) advertising is an invaluable tool for Amazon sellers looking to maximize their visibility and sales on the platform.
Using Amazon PPC (Pay-Per-Click) advertising effectively involves several key steps:
Keyword research: Use tools like AMZScout's Keyword Search to discover high-performing keywords and assess their competitiveness.
Campaign setup: Choose between Sponsored Products, Sponsored Brands, or Sponsored Display ads, depending on your advertising goals.
Targeting options: You can choose between automatic targeting, where Amazon selects keywords for you based on your product information, and manual targeting, where you select specific keywords to bid on yourself.
Budgeting and bidding: Set your daily budget for the campaign and establish your bids for each keyword.
Ad creative: Create compelling ad copy and imagery that will entice potential customers to click on your ads.
Monitoring and optimization: Use tools like Keyword Tracker to identify opportunities for optimization and refine your targeting and bidding strategies accordingly.
By leveraging PPC campaigns, Amazon sellers can strategically target relevant keywords and reach potential customers at the moment they're actively searching for the best products that are similar to theirs.
Conclusion
Selling on Amazon in Canada presents exciting opportunities for businesses to expand their reach and tap into a thriving marketplace.
By leveraging the benefits of Amazon's infrastructure, conducting thorough product research, sourcing reliable suppliers, and utilizing tools like AMZScout, Amazon resellers can effectively establish and grow their presence in the Canadian market.
Start your journey today and elevate your business to new heights!
