How to Build a Brand in 5 Steps: An Amazon Seller’s Tips
Many of us dream of generating thousands of dollars worth of passive income, but only a few actually make it happen. I am one of the lucky ones. I started my own business from scratch, and I’ve learned many lessons and made numerous common mistakes along the way. In this article, I will share my strategy for starting a brand, which can help you earn over $10,000/month.
About Me
My name is Andre Calzone, and I have a proven track record as a successful Amazon Private Label seller. I started my Amazon journey with a dream of entrepreneurship, a desire to spend more time with my wife, and adequate income to support my two passions - cars and travel.
Initially, I began with Amazon FBA and discovered the power of earning a passive income while enjoying the freedom it offers compared to traditional 9-to-5 jobs. E-commerce quickly became my passion, and now I’ve established three online ventures alongside Amazon.
Over time, I developed multiple brands on Amazon, and with my experience, I’ve also become a mentor to other aspiring entrepreneurs. In this article, I will share a comprehensive guide on building a brand on Amazon as a private label seller.
What is Amazon FBA Private Label?
First, let's explore the significance of the Amazon FBA Private Label business model. Private label branding means creating a brand that's uniquely yours, with products made according to your specifications and bearing your logo.
There are various fulfillment methods available, but opting for Amazon FBA to handle all aspects of your order fulfillment can really streamline the entire process. You just list your product on Amazon and have it shipped to an Amazon FBA center. When the order comes in, Amazon packs and ships it directly to the customer, leaving you with a profit and minimal hassle.
With this method, Amazon deals with logistics while you focus on your product development and marketing.
Is Launching Your Own Brand Profitable?
I'm asked frequently how much money you can make selling products from your personal brand. The answer varies depending on several factors, including product selection, advertising strategy, and brand awareness. Typically, if you initially invest between $2,000 and $5,000, you can expect to generate an average revenue of around $10,000/batch. However, if you establish a strong brand presence through private labeling, you can earn even more.
How to Build a Brand on Amazon Successfully
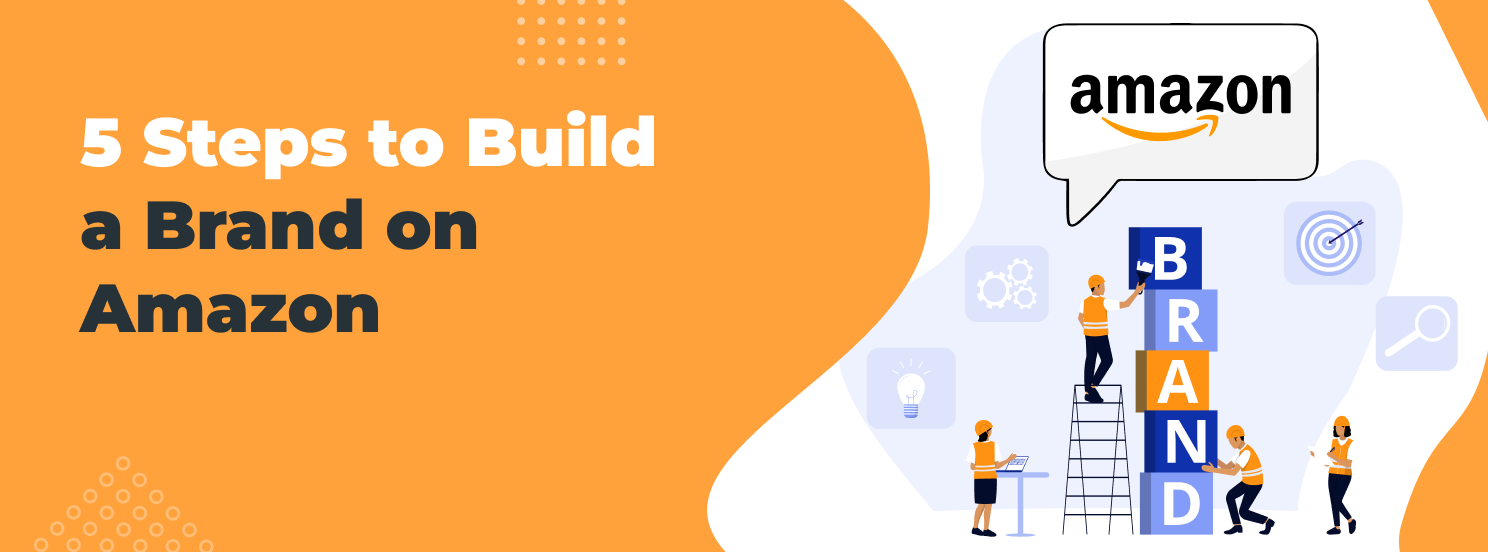
There are various paths for sellers who want to create a brand of their own, each with its own respective approach and requirements. If you’re thinking about starting a brand on Amazon in a relatively short time frame, I recommend taking the following steps:
Analyze the market.
Find your product idea.
Brand your business and obtain a trademark.
Set up efficient shipping.
List your products.
Now we’ll explore how to build a brand, step-by-step. Below, you'll discover a comprehensive guide for each stage.
Step 1: Exploring Product Ideas
From my experience launching numerous brands on Amazon, I've learned that building a brand really depends on having the right product. Without a suitable product, all of your marketing efforts will be wasted, and you won't be successful. To start a brand it's necessary to find an item to sell by conducting a thorough market analysis.
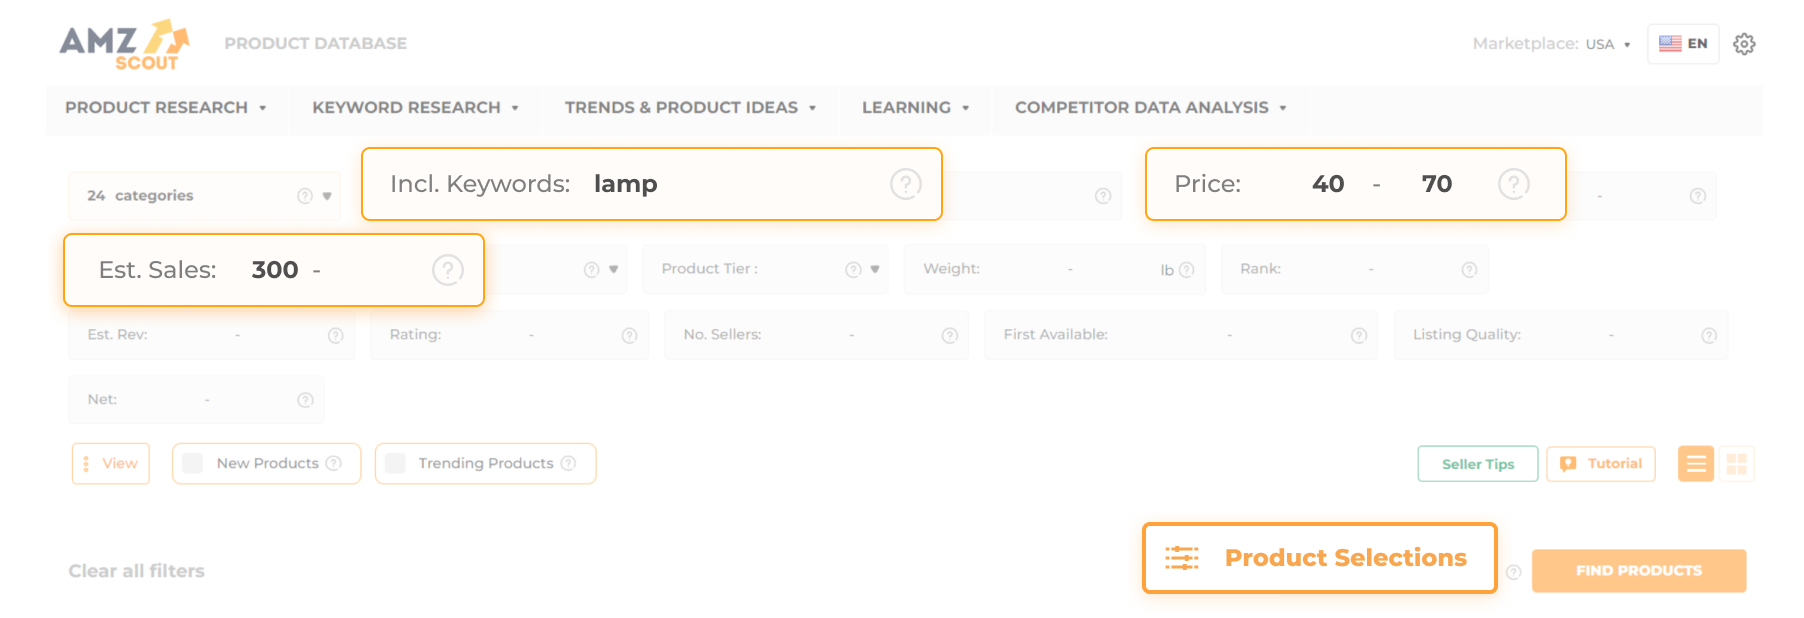
To ensure I find the most profitable items, I rely on the Product Database from AMZScout. This extensive database contains over 600 million products, and enables me to find product ideas that align with my criteria. Here's how I utilize it:
1. Access the Product Database on AMZScout.
2. Apply filters to refine your search. There are 16 criteria to help you narrow down your search. I use these:
Price: Between $30-100.
Reviews: Maximum of 100, to minimize competition with well-established sellers.
Estimated Sales: 500-1,000/month, to ensure stable demand.
Weight: Under 5 lbs for more affordable shipping.
3. Retrieve a list of products. Click "Find Products" to display items that meet your specified criteria.
Once I gather product ideas for my private label, I conduct a thorough product analysis to verify its viability and ensure that it's worth selling. Let's delve deeper into how to conduct this type of analysis to determine the true potential of any item.
Step 2: Choosing a Product
Checking the potential profitability of a product requires gathering and analyzing a lot of data, and calculating various metrics. I prefer to have AMZScout handle this task for me, as their tools are designed to streamline the process of assessing each item’s viability.
Here's how to utilize AMZScout effectively:
1. Install the AMZScout PRO AI Extension.
2. Search for a product. Enter the product name or ASIN in the Amazon search bar.
3. Open the Extension. Click on the AMZScout icon located in the upper right-hand corner of the page. The Extension will present detailed statistics for a list of items that match your search query.
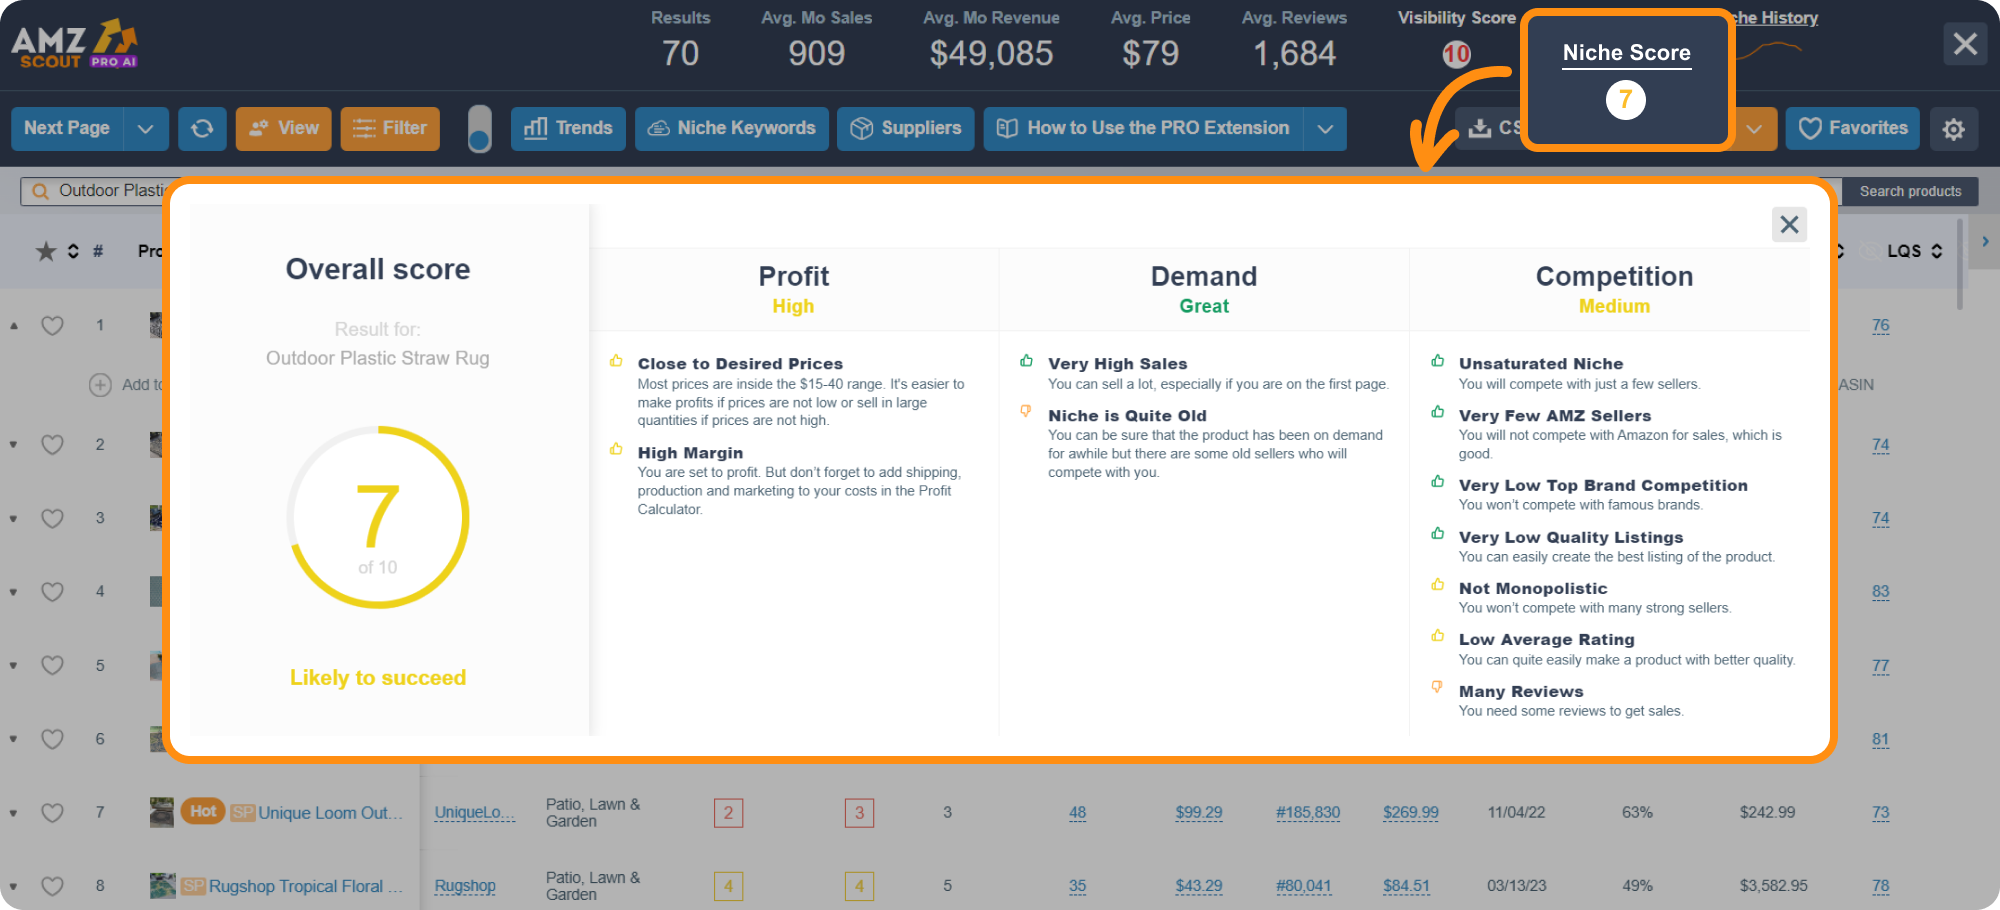
4. Check the niche’s performance. I begin by checking the Niche Score, found in the top-right corner. This score factors in demand, competition, and potential profit, with a text explanation regarding its business viability. It helps sellers access the market quickly and select products with higher niche scores. I prioritize niches with a score of 7 or higher to ensure profitability.
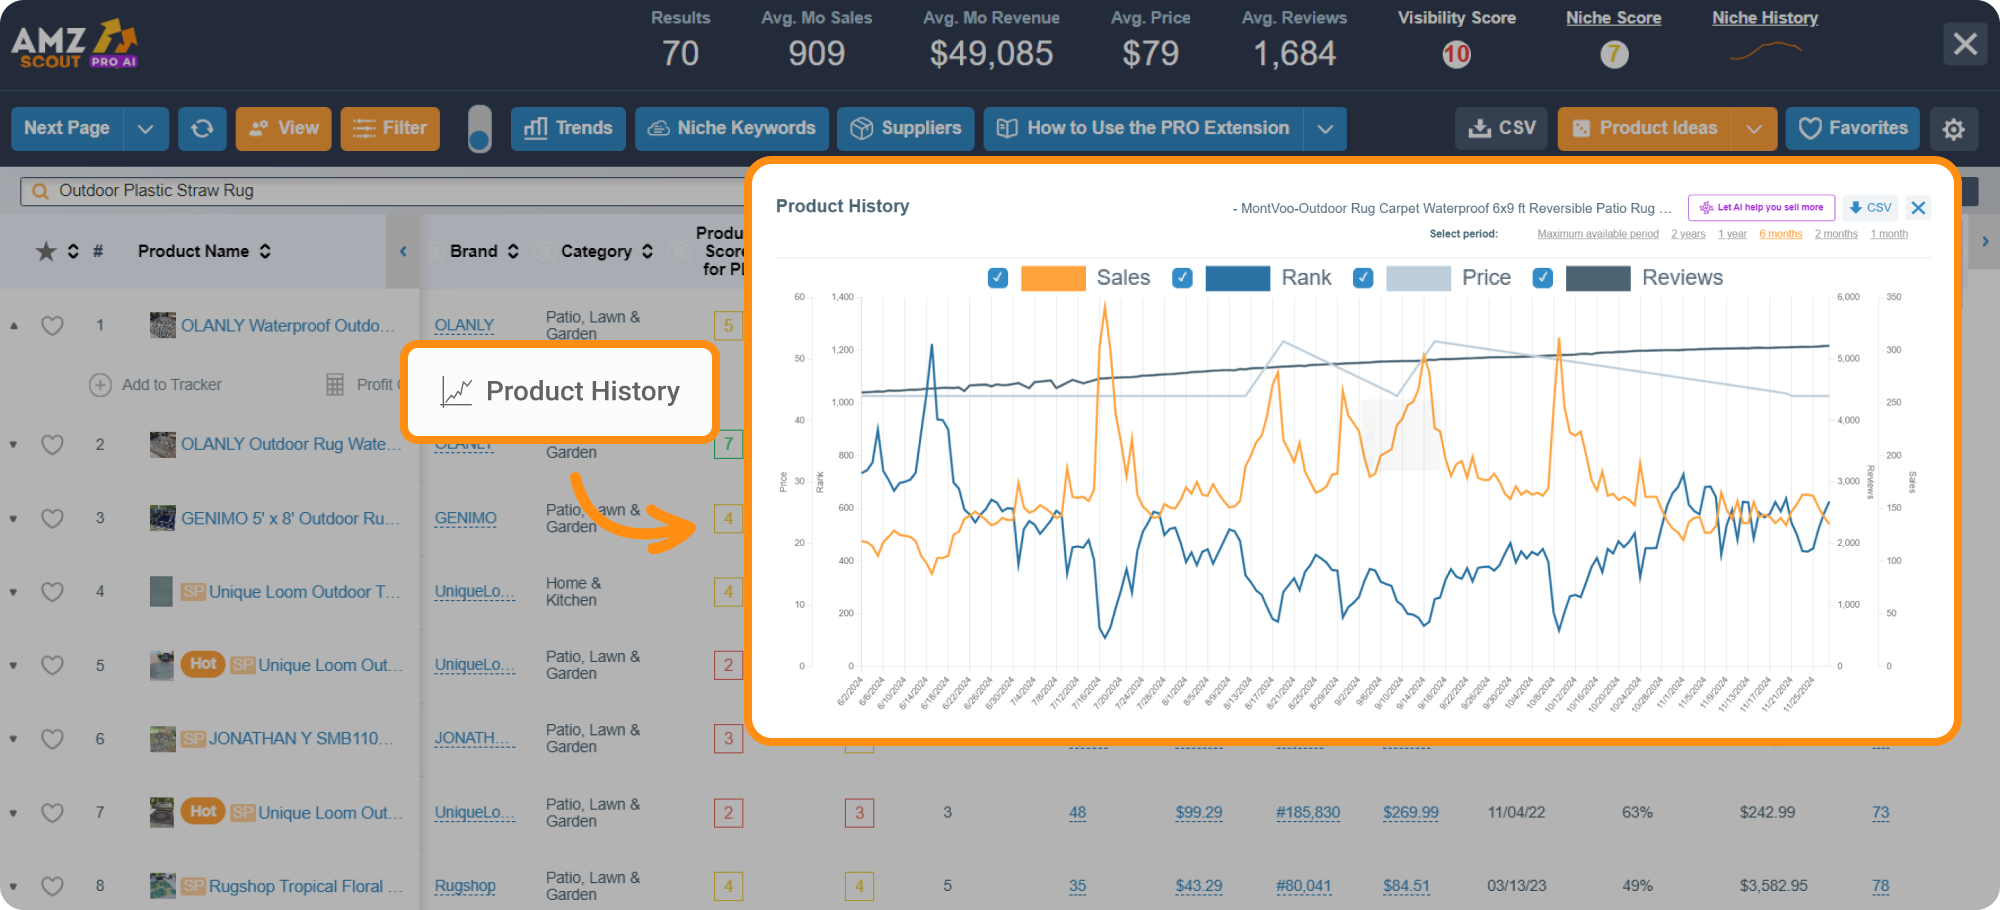
5. Assess the product history. If a niche score looks promising, I proceed with my research and analyze individual products in the niche. Click Product History under any item in the result list to check:
Sales volume: Always verify each item’s sales volume to ensure that the trend is stable or rising, indicating stable demand.
Pricing fluctuations: Check for changes in price to help you determine how to adjust your own pricing strategy accordingly.
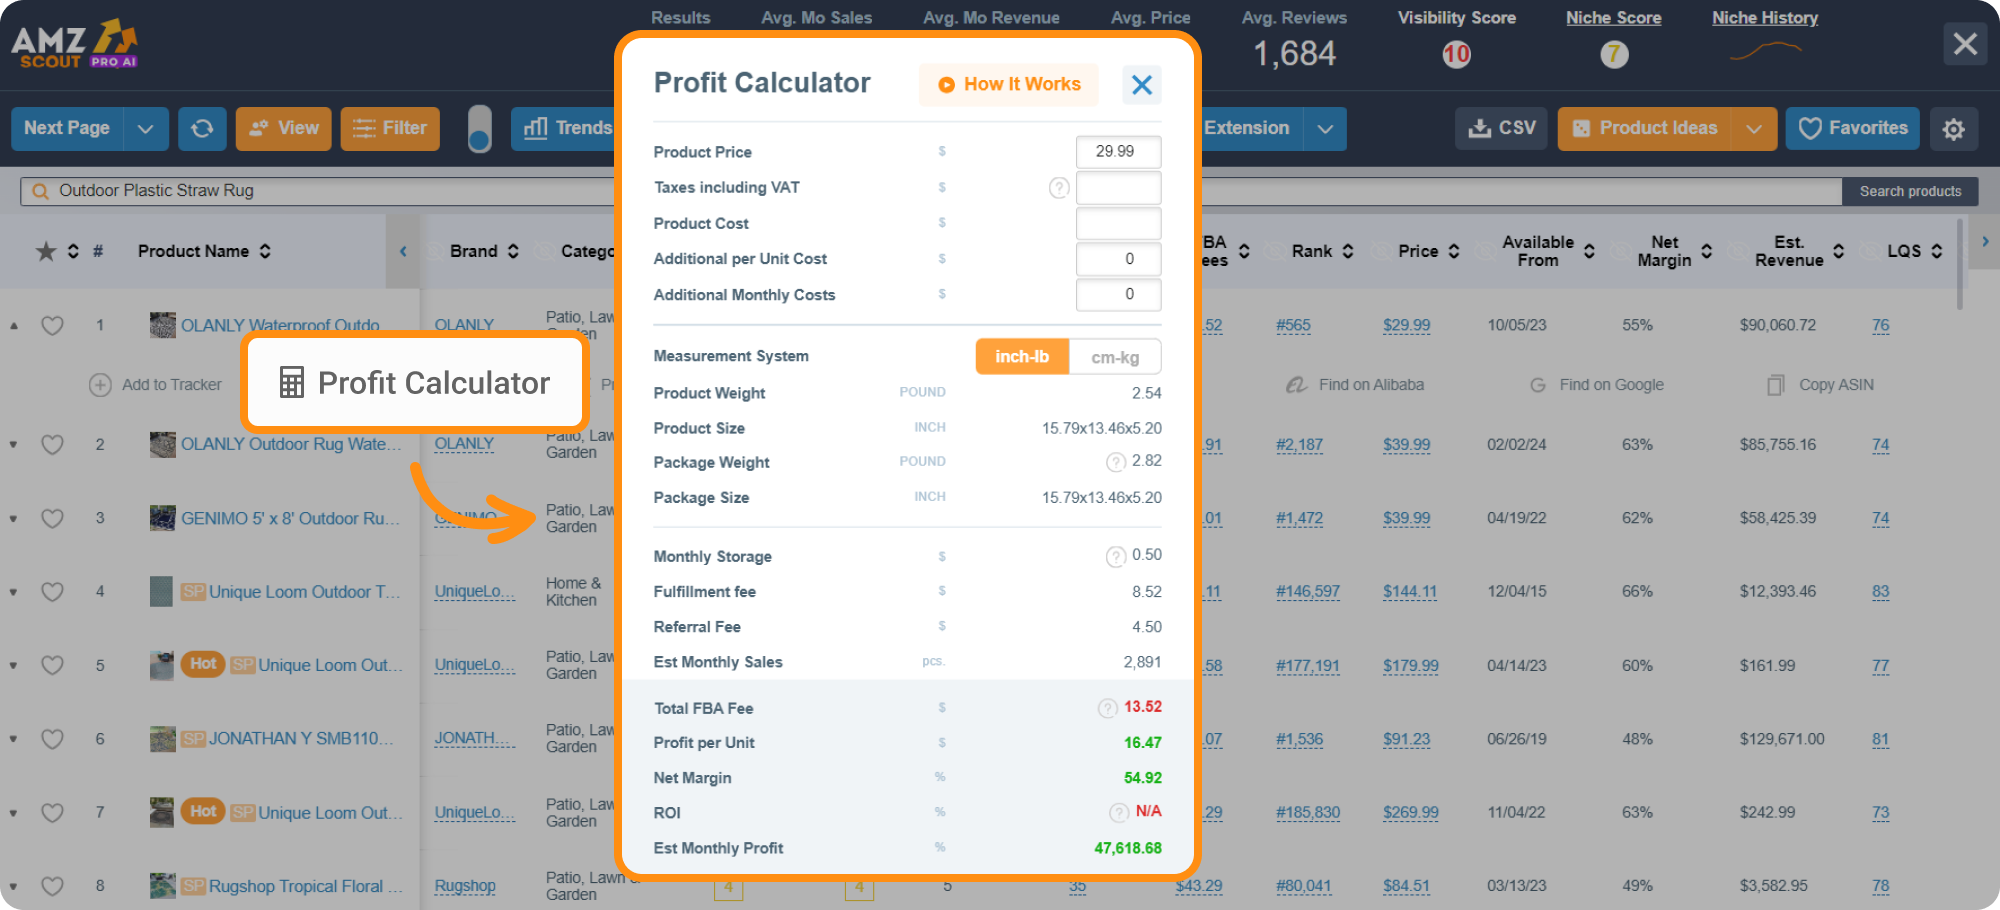
6. Calculate the profit margin. Regardless of whether you're enthusiastic about a product or not, this step is essential. Unexpected results can arise from both low margins (under 10%) and extremely high ones (over 30%). To check the profit margin, follow these steps:
Click on the Profit Calculator under any item in the list.
Enter your costs for the item, including the purchase price, shipping expenses, etc.
Get your results. The extension will automatically display your profit margins, showing you how much you can make on every product.
I focus on products with a minimum 20% margin to ensure that the profit-per-item is at least double its price.
Additional Criteria for a Private Label Product
Through my experience in brand development, I've formulated a unique approach that works for both my students and myself. I take the following factors into account when building a private label:
High price point: Through my experience and research, I've discovered that customers prioritize quality over price. They're willing to pay more for superior quality, even if similar products cost less. Thus, I prefer to offer products at a higher price point, which leads to increased sales and profits.
Advancing capacity: I always read any negative reviews to identify areas for product improvement. Enhancing the product allows me to justify a higher price by emphasizing the benefits to customers. Once I've researched the features that require improvement, I reach out to suppliers to discuss ways to make the product better.
Product universe: When establishing a brand, I concentrate on offering related items to expand my product line. For example, if I sell tennis balls, I also incorporate complementary equipment like rackets, tennis bags, and more. This approach strengthens the brand story and encourages customers to purchase multiple products.
Product Sourcing
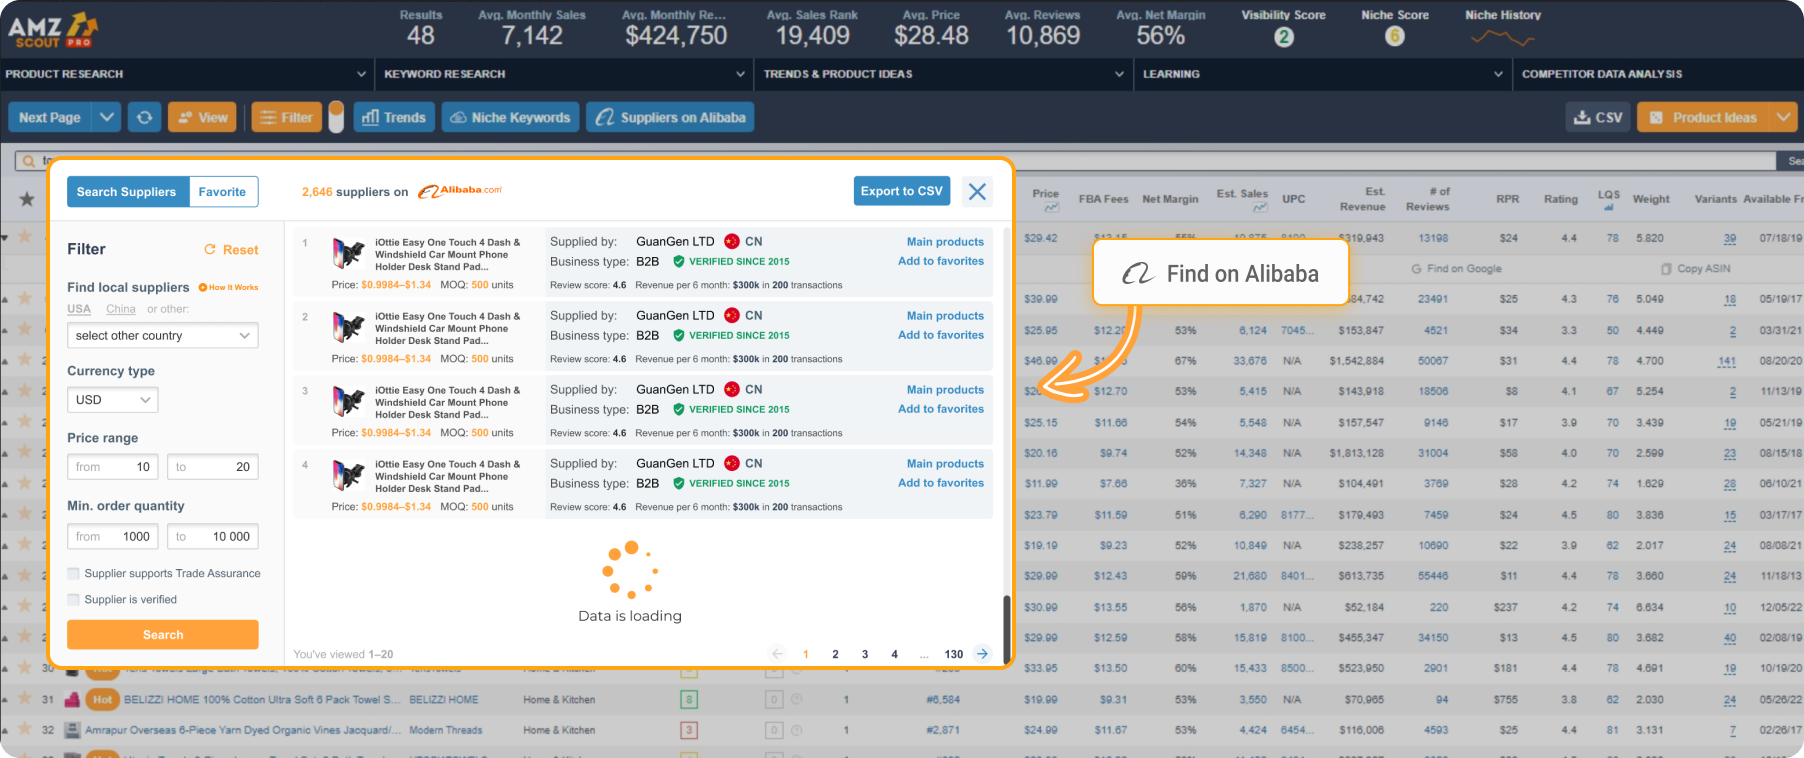
With the AMZScout PRO AI Extension, you can also find a supplier for a profitable product immediately. Many sellers prefer to use Alibaba for its competitive prices and extensive product selection. Simply click "Find on Alibaba" under any product in your list to see the prices and ratings for suppliers offering a given product. When you’re starting a private brand, ensure that the supplier can manufacture a product under your logo, personalize it, or make any necessary enhancements as needed. Contact at least 10 suppliers to find the most suitable option.
The PRO AI Extension enables sellers to conduct detailed product research with ease, providing the most accurate data available. This tool saves time by determining the profitability of an item and finding a supplier fast.
Step 3: Trademark & Branding
Once you complete your product research, you need to develop your brand identity by creating a unique brand name, logo, product design, and packaging. Your brand name and logo should resonate with your target audience, while a high-quality packaging design should reflect your brand's identity and values. These elements are intended to differentiate your products from competitors and enhance their perceived value to customers.
Once you’ve established your brand, it's crucial to register it in order to protect its identity and ensure legal recognition.
To register your brand, follow these steps:
Brand name: Choose a unique and memorable brand name that resonates with your target audience. To avoid legal complications and establish your brand identity, check the availability of your preferred brand name. Go to the USPTO (United States Patent and Trademark Office) website to make sure your brand name has not already been trademarked. USPTO is a U.S.-based organization that registers trademarks to protect intellectual property.
Service class: Refer to the USPTO's classification system to determine the appropriate service class for your brand. Goods and services are organized into specific categories, helping to define the scope of your brand's protection. Otherwise, your brand may be vulnerable to potential infringement issues, such as unauthorized use by others operating in the correct class.
Brand registration: Access the Amazon website to complete your application for brand registration. The Amazon Brand Registry allows you to control product listings, monitor for potential infringements, and take action against unauthorized sellers. It also offers several tools to help you grow your brand. For example, Amazon Vine helps to collect reviews for new products, which is crucial for optimizing your product listing.
By ensuring the protection and promotion of your brand, you can significantly increase your chances of success with Amazon's private label.
Step 4: Cheapest & Fastest Shipping
Once you've found a profitable product, identified how to enhance it, registered your brand, and manufactured the product, now it’s time to focus on product delivery.
Try to find the fastest shipping method and negotiate the most affordable option with reliable suppliers. Here are some key questions to ask your supplier, as they will impact the price directly:
Where will they ship the products from? It's important to note that discrepancies between the company's legal address and the actual shipping location may affect the price.
What type of shipping paperwork is required for the box ID label? It's important to check that a supplier uses the correct shipping documentation to ensure smooth customs clearance.
Which shipping carrier and delivery method will be used (air or sea)? This influences the speed and security of your delivery.
How many units will be packed per box, and how many boxes will be shipped? You need to specify the price per volume of your purchase. Ordering in bulk can be more cost-effective, allowing you to save funds on delivery and increase your profit/unit.
What are the weight and dimensions of each box? These factors will impact the shipping price directly.
It's advisable to negotiate DDP (Delivered Duty Paid) delivery terms. “DDP” means that the supplier is responsible for paying any import duties on goods delivered from overseas to your country. This arrangement can lead to significant cost savings on customs fees. Additionally, if your supplier agrees to DDP, this signifies their reliability as a reputable company that understands the international logistics management process.
If a delivery is not cleared through customs and requires fees to be paid, Amazon may reject it, resulting in wasted time, money, and additional effort. Therefore, securing DDP delivery terms can help streamline the shipping process.
Creating a Shipping Plan
Now that you have negotiated the delivery conditions, the next step is creating a shipping plan to have your supplier deliver products directly to Amazon FBA. Follow these brief instructions:
Confirm inventory to send. Access the “Inventory” section in your Amazon Seller Central Account, and select which items you want to send to Amazon FBA.
Confirm shipping. Choose the Amazon FBA center to which you want to send products, and specify the carrier and shipping dates.
Download FBA box ID labels. Download the FBA box ID labels, and send them to your supplier to apply to the boxes. This ensures that once the delivery arrives at Amazon FBA, they know that you sent your products to them.
It's important to note that you can only create an Amazon shipping plan for products that are already listed on the platform. In the next section, I'll provide a detailed guide on how to list your products on Amazon.
Step 5: Add a New Product Listing
To begin selling products on Amazon, you'll need to create a product listing. Here's a brief guide:
1. Log in to your Amazon Seller Central Account.
Navigate to the "Inventory" section.
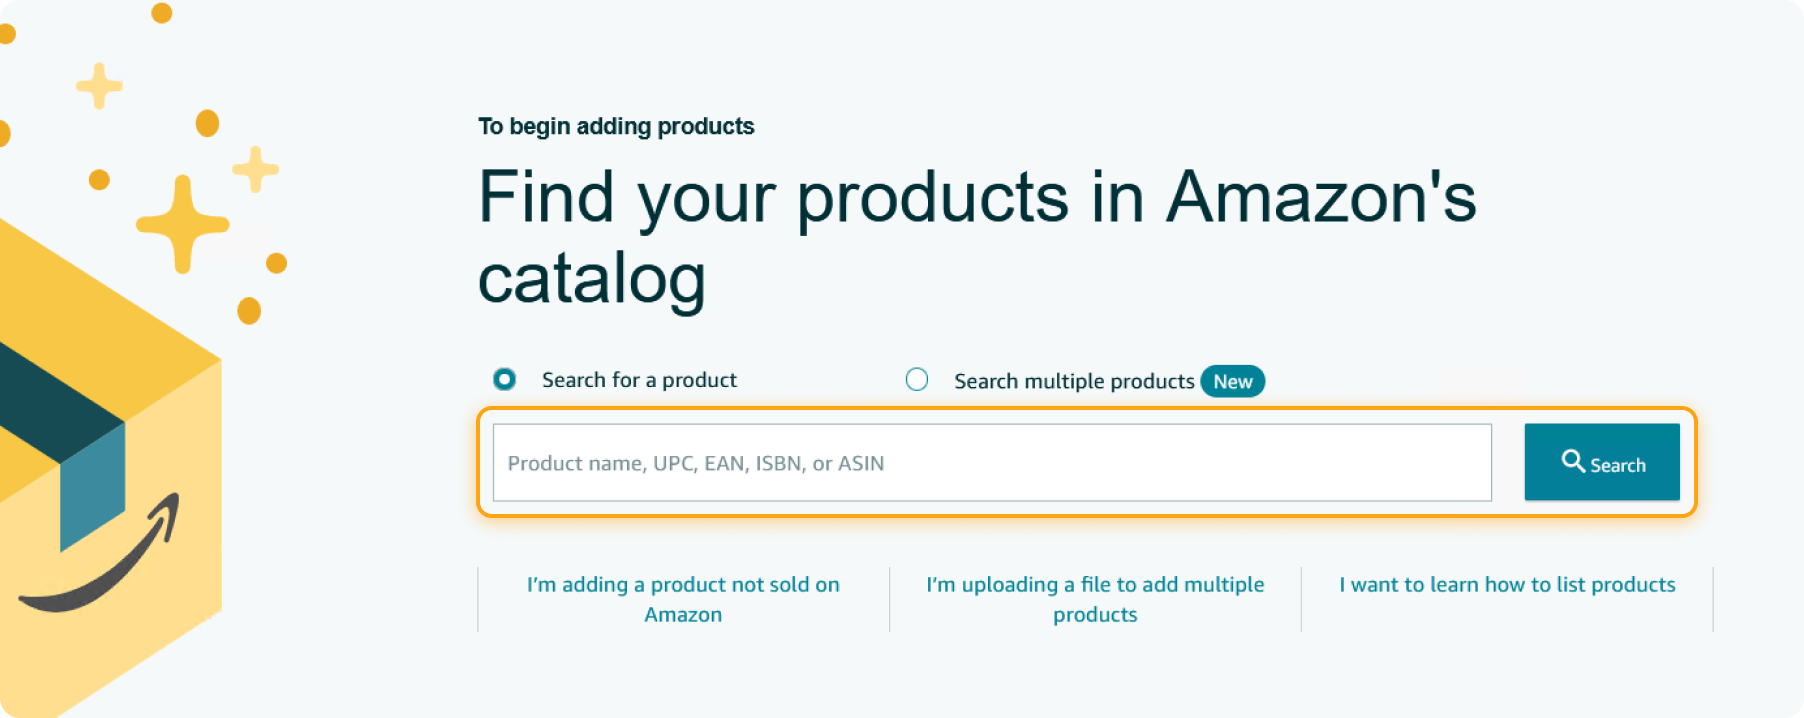
Click "Add a product".
2. Provide Product Identity information. This includes selecting the product category, entering the product ID (EAN/UPC), and other relevant details.
I recommend utilizing FBA as a fulfillment method, as this option streamlines inventory management and typically offers lower shipping costs compared to other fulfillment options.
3. Craft your Product Description. It's essential to create compelling, SEO-optimized text that includes:
Title
Description
Bullet Points
4. Upload Product Images. Be sure to use only high-quality photos and high-resolution videos. If needed, seek assistance from a professional photographer.
5. Set up your Offer. Upload your product’s variations (if applicable), specify the quantity, and other details.
6. Ensure Safety and Compliance. Specify the country of origin and indicate whether batteries are required, among other necessary details.
7. Save your listing. Click "Save" and start selling your products.
For optimal performance of your listing, there are additional key elements to consider:
Utilize keywords: Conduct thorough research to identify the most popular keywords for your product and integrate them into your title, description, and bullet points.
Adhere to Amazon’s guidelines: Avoid using banned symbols or words, and ensure that your text length complies with the requirements for your product category.
To help you streamline your keyword research and ensure compliance with Amazon guidelines, consider using AI Listing Builder. This tool enables you to retrieve keywords from your competitors automatically or upload your own list. This feature’s built-in AI feature generates compelling text effortlessly for titles, bullet points, and descriptions, all enriched with relevant keywords. Additionally, it verifies compliance with Amazon’s guidelines, alleviating concerns about potential rule violations.
By crafting a well-optimized listing, you can achieve a higher search rank and increased visibility, ultimately driving more sales.
Amazon Seller Mistakes And My Tips
As a mentor to aspiring Amazon sellers, I draw not only from my own experiences but also from those of my students. There are four common mistakes that can significantly impact the success of your business:
Analysis paralysis: I've been there myself. It's the imposter syndrome where fear of choosing the wrong product leads to inaction. But with millions of sellers on Amazon, you can be one of them and take steps to improve your financial state. Especially with the AMZScout toolkit, conducting research is easy, so you can confidently select the most profitable product.
Choosing FBM over FBA: From personal experience, I’ve found that FBM can slow down your business. Numerous case studies and stories prove that shipping costs are always lower with FBA. Moreover, FBA offers more advantages: no logistics hassles, better chances of winning the Buy Box, and access to Prime.
Neglecting branding and getting lost among competitors: While reselling products may seem easier and more affordable, private labeling offers greater long-term profitability and scalability. By branding your products, you can distinguish yourself among your competitors, build your own customer base, and gain higher visibility and sales.
Ignoring reviews: Always read the reviews of your competitors. These provide insights into what customers truly need, allowing you to improve your product and stand out. It's also essential to monitor your own reviews and respond to them accordingly. Exceptional customer service is highly valued and can lead to increased sales.
Entering the market may seem hard at first, but by following these guidelines and avoiding common pitfalls, you'll be able to start selling and generating income soon.
Conclusion
Selling products through Amazon FBA private label is undoubtedly one of the most profitable ways to make money. However, achieving success in this endeavor requires consistent effort in building and maintaining brand identity. Fortunately, the AMZScout toolkit can help you with product selection, making your journey towards profitability much easier. My own experience is evidence that building a brand through Amazon FBA can lead to financial stability and the satisfaction of achieving your goals.
To learn more about succeeding in the Amazon FBA business, visit my YouTube channel.

